Git in VS Code and the Terminal: A Practical Guide
Git is one of the most important tools for modern software development. It helps you keep track of changes, collaborate with others, and safely manage different versions of a project. In practice, developers often use Git in two ways: through the Visual Studio Code interface or directly in the terminal. Both approaches are useful, and understanding the connection between them makes daily work much easier.
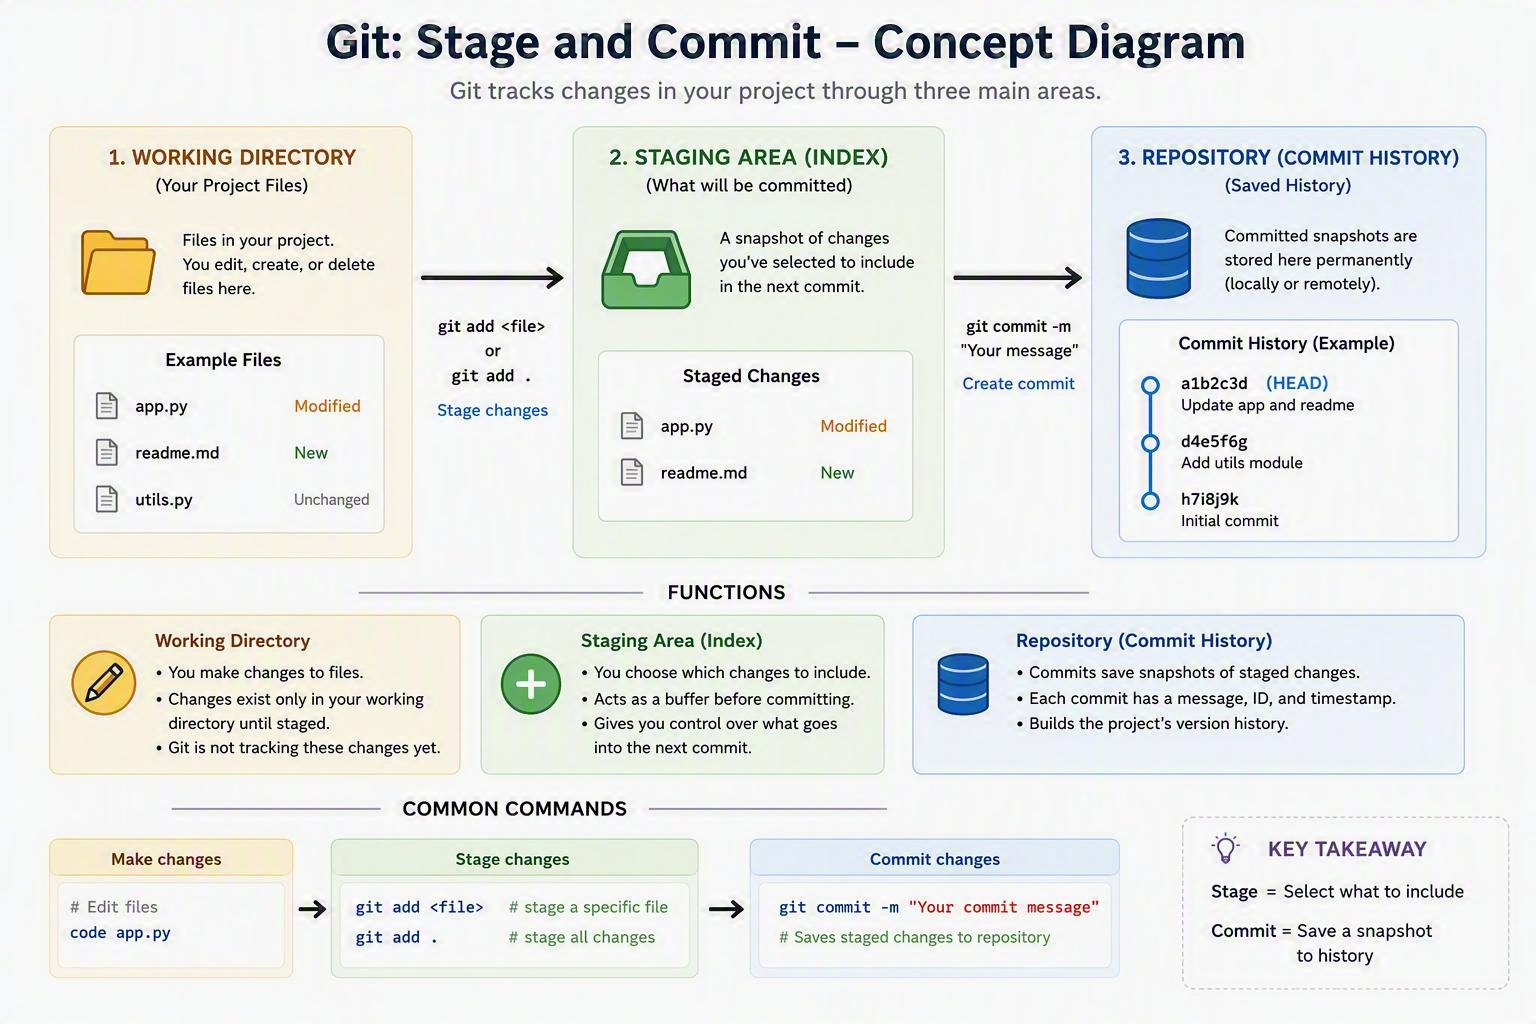
🧩 Core idea
The Git tool in Visual Studio Code is a built-in interface that lets you perform most everyday Git operations without leaving the editor. You can stage changes, create commits, switch branches, review diffs, merge work, and push or pull updates directly from the Source Control panel. In other words, VS Code acts as a visual front-end to your local Git installation.
📌 How VS Code detects and displays a Git repository
When you open a folder, VS Code checks whether it contains a .git directory. If the folder is a Git repository, the Source Control panel appears automatically. In the left sidebar, you can usually see:
- Changes: files with unstaged edits
- Staged Changes: files prepared for the next commit
- A commit message box
- The current branch name
- History or graph views if you install Git-related extensions
🛠️ Everyday workflow in VS Code Git
1. View changes
Modified files appear under Changes. Clicking a file opens a diff view where the left side shows the previous version and the right side shows the current version. In this view, green usually means added content and red means removed content.
2. Stage changes
You can stage individual lines, individual files, or all changes at once. Staged items move from Changes to Staged Changes.
3. Commit
You type a commit message and press Ctrl+Enter or click Commit. VS Code runs the Git commit operation for you behind the scenes.
4. Push and pull
A small cloud-like icon appears in the bottom-left corner of the window when your repository has remote changes. Clicking it will push or pull depending on whether you have outgoing or incoming commits.
5. Branching
You can click the branch name in the lower-left corner to create a new branch, switch branches, delete branches, or compare branches.
6. Merge
To merge another branch into the current one, switch to the target branch and use the command palette with Git: Merge Branch. VS Code also provides a visual way to resolve conflicts by showing Current Change, Incoming Change, Both, and Compare.
🔍 Advanced features
Timeline view
This shows the history of a file over time.
Commit graph
If you install GitLens or Git Graph, you can see a visual commit graph with author information, commit messages, and branch relationships.
Inline blame
Hovering over a line can show who last changed it and when.
⚙️ Under the hood
VS Code does not replace Git. It simply calls your system’s Git executable and displays the results in an easier-to-read interface. If Git is not installed, VS Code will prompt you to install it.
🧭 Why developers like VS Code Git
- It makes staging and committing faster.
- The diff viewer is clear and easy to inspect.
- Conflict resolution is simpler than working only in the terminal.
- Branch switching is convenient without opening a shell.
- It integrates well with remote services such as GitHub, GitLab, and Azure DevOps.
🖥️ Doing the same work from the terminal
If you want to do everything you normally do in VS Code’s Git panel from the terminal, these are the essential commands.
1. Repository setup
git init
git clone <url>
2. Checking status and history
git status
git log
git log --oneline --graph --decorate --all
3. Staging changes
git add <file>
git add .
git restore --staged <file>
4. Committing
git commit -m "your message"
git commit -am "your message"
5. Branching
git branch
git branch <name>
git switch <name>
git switch -c <name>
6. Merging
git merge <branch>
git merge --abort
7. Remote operations
git remote add origin <url>
git push origin <branch>
git pull origin <branch>
git push -u origin <branch>
8. Undoing and fixing
git restore <file>
git reset --soft <commit>
git reset <commit>
git reset --hard <commit>
9. Viewing diffs
git diff
git diff --cached
git diff <commit1> <commit2>🧠 What each Git action means and why it is used
Here is a brief explanation of the purpose of each common action.
git status: shows the current state of your working directory so you can see which files changed, staged, or remain untracked.git add: moves changes into the staging area so you can prepare exactly what should be included in the next commit.git commit: saves a snapshot of the staged changes into Git history with a descriptive message.git push: uploads your local commits to a remote repository such as GitHub.git pull: downloads the latest changes from the remote and updates your current branch.git branch: lists existing branches or creates a new one to isolate work.git switch: moves you to a different branch so you can work on another task or version.git merge: combines the changes from one branch into another branch.git log: shows the commit history so you can review what happened and when.git restore: reverts changes in files or unstages them when you want to undo a mistake.git reset: moves the current branch pointer to an earlier commit and is useful for undoing commits or rewriting history.git diff: displays the exact line-by-line differences between versions before you commit them.git tag: creates a named marker for a specific commit, commonly used for releases such asv1.0.0.
🎯 Summary cheat sheet
The commands you will use most often are:
- Check changes:
git status - Stage changes:
git add . - Commit:
git commit -m "msg" - Push:
git push - Pull:
git pull - Switch branch:
git switch <branch> - Create branch:
git switch -c <branch> - Merge:
git merge <branch>
In short, Git helps you track, review, and share your work. VS Code makes the process visual and accessible, while the terminal gives you direct control and flexibility. Learning both is a strong foundation for productive development.